As you may recall from episode one of this saga, I had ordered new pieces for the Jetta's fifth gear synchronizer cluster from the local VW dealer. Delivery time was quoted as two days. but it actually took three. Meanwhile, I reopened the transmission to finish the job of removing the existing gear set, which is where the job had stopped after the discovery of broken bits. There was still the challenge of the selector gear, which had obstinately rebuffed all efforts at removal. Having broken my modified el-cheapo gear puller in the first episode, I now borrowed a (hopefully) better puller from airport buddy Bill. You may remember Bill from the tug tire story, where his pneumatic impact wrench proved insufficient for the immovable bolt. Bill is a race car guy, and at present is working on a pair of midget cars - one for dirt track, the other for paved.
Bill's puller looked promising; its arms fit into the slots on the selector gear, which had been the beginning of my gear puller's difficulties. Nonetheless, I made sure to make another generous application of penetrating oil before getting started. The threads of the puller got a dose of heavier oil for lubrication, a trick I learned from long-time car buddy Roger. Besides being of better construction, Bill's puller had another difference from mine: it didn't have wrench flats on the bolt head, but rather a sliding handle like the ones seen on C-clamps. I snugged it up on the gear and started tightening it up. Once it was tight, the thumb handle made it a lot harder to increase the tension compared to using a wrench, and progress was slow. I thought I was finally making progress when I felt a little snap in the handle. A couple more turns, however, and the puller started wanting to cock over to one side. So I backed off and reset it for another try, taking greater care to be sure everything was centered and straight. Once again it wouldn't stay straight. When I pulled it off this time, I saw that the bolts holding the puller together had bent; all four were slightly V-shaped. I took it apart and then reassembled it using AN3 aircraft bolts (and thereby probably doubling its value). Once again into the breech! Well, something like that anyway. However this time, the puller stayed straight - right up to the moment that it snapped. There was no mistaking it: I'd broken Bill's puller too. The bolts had held, but the arm links had not - each side had failed at the bolt holes.
By now I figured I owed Bill a new puller anyway, so I disassembled it again and borrowed the somewhat heavier links from my broken puller to cobble it back together once more. More penetrant on the gear, more oil on the threads, and I was ready to give it another shot. But this time I upped the ante: once the puller was on and the gear was under tension, I got out the propane torch and gingerly applied heat to the gear. Using a torch to heat up machined parts is an accepted practice and sometimes necessary, but I'm always reluctant to do it for fear of damaging something. This was what the doctor ordered though - the snap I felt this time was the gear moving. I had to reset the puller again to finish the job, but I finally had the selector gear in my hand.
Compared to the selector gear, the two gears themselves were pretty easy. I did have to employ the rebuilt puller again, but the torch wasn't needed. After a week of being stalemated, I had finally gotten the first half of the job done:
Putting in the new gears went smoothly, but that brought me back to the selector gear and the synchronizer. Remember those loose pieces in the pan way back in the first installment? I now had to figure out how to get them back in correctly, which I obviously hadn't managed to do the first time around. Since I was still waiting for the parts to arrive at the dealer, I spent one whole evening researching how those pieces were supposed to go together. It seems I was not the first to have this problem. The problem was compounded by VW's redesigning these parts after a year or two of production.
 These were the easy parts. Look at the first picture in the first installment to see the hard ones. These are the new gears; if you look closely at the gear on the right, you can see that the one in this picture is slightly smaller than the one in the first picture: Compare where the gear teeth are in relation to the big washer that holds the gear in place.
This redesign problem became more apparent when the ordered parts arrived. I realized that I had received revised parts, but did not have a revised transmission. The new parts would have to be unrevised to work with the existing stuff. Fast forward through another hour or two with pliers, cutters, bench grinder, and files. I was now faced with getting the reassembled selector gear and synchronizer back into the transmission. The selector gear was no more willing to go on than it had been willing to come off. The instructions I had did say that the factory used a press to put it together originally, and that it would have to be driven on. My first attempt at this did not seem promising, so before I got too committed I pulled it off and took stock. Time for the torch again.
Since the first application of the torch, I'd found my no-touch thermometer, a nifty little gadget that can determine an object's temperature from several feet away. So armed, I felt more secure heating the gear up for reinstallation. I don't remember how it happened, but part way through this process I was distracted by something, and when I looked back I realized that I had heated one of the retaining springs to a dull orange. This was one of the same pieces that I'd spent an hour or so revising in the previous paragraph. For those who don't already know, a good way to ruin a metal spring is to heat it to the point that it loses its temper - it becomes brittle and all the springiness is lost. Fortunately I'd ordered a spare. Unfortunately, it would also need the unrevising procedure; back to the grinder.
By the time that was done, it was too dark to continue, so another day gone. Meanwhile, I was still at the helm of Dick's airport car. It being dark, I spent a little time on the wagon's lights, as Dick had told me that it hadn't any headlights. I managed to get the low beams to work, but selecting the high beams produced a severe absence of light. Oh well, at least that was enough to get home with. A few other bulbs also needed attention, after which I made it home without incident.
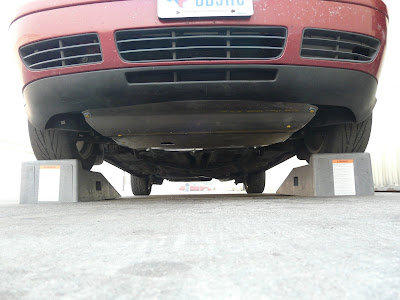
The next day, having remembered to disconnect the airport car's battery and thus avoid a repeat of the no-start episode, I was back at it and managed an uneventful reassembly of the Jetta's transmission. I hadn't liked the way the Redline MT-90 oil had felt when shifting, so this time I filled the transmission with the slightly thinner Redline MTL. Once the transmission was all buttoned up, I took a test drive around the airport. The shifting action felt better, so there was one small victory. After checking for leaks, I took it out on the road. I held my breath the first time I went for fifth gear, but it went right in. The first downshift was another tense moment, but it did just fine. Phew! A few more enroute back to the hangar, where I then installed the engine bay side panel and the new aluminum belly pan, which looks and acts more like a skid plate on a four-wheel drive truck. No more worrying about road debris holing the oil pan! (A common issue on this generation of VW's, which use cast aluminum oil pans.)
In the subsequent week, the car has driven well. The new fifth gear drops engine rpm's by eleven percent, as compared to the original. This produces about 65 mph at 2000 rpm, whereas the original fifth gear gave about 60 mph at the same revs. I don't expect any noticeable change in fuel economy, but the car seems a little happier and quieter on the freeway. I'm guardedly optimistic that I got it right this time, but I'm ordering another set of the bits and pieces from the dealer just to make sure (a complete set of revised bits and pieces this time). Having them on hand should guarantee that I'll never need them. Let's hope so, since the acid test will be next month's road trip. Better renew my AAA . . .
Postscript: This entire ordeal would have been even more trying if not for the help from the several named airport buddies. Thanks again to Kenny, Bill, and Dick. Kenny's explanation of 220 wiring was eye-opening. Bill conceded that he'd broken his puller before I'd done so, and kindly accepted it back in its repaired condition (along with a case of Coke Zero -his favorite). Once the Jetta was restored to operational status, I spent a day fixing Dick's airport car. The main electrical problems of battery drain and overcharging both went away after the alternator was overhauled. My diagnosis of a bad voltage regulator was spot on (even I get lucky every now and then). The mysterious motor that I unplugged turned out to be the power antenna, which is mounted in the fender next to the HVAC housing. I was surprised to find that I got over 18 mpg out of that car - who'd a thunk?
The titles for episodes One and Three come from the three witches in Act 4, Scene 1 of "The Scottish Play" (Shakespeare's M@cb*th).
For those of you who are tired of this story of my mechanical ineptitude, I'll admit that I'm getting sick of it too - When I began, I had no intentions of beginning a trilogy. Stick around: I promise next time we'll get back to the big airport.


No comments:
Post a Comment